
Crimson Desert Elixir Factory Walkthrough: How to Complete the Arboria Castle Sequence
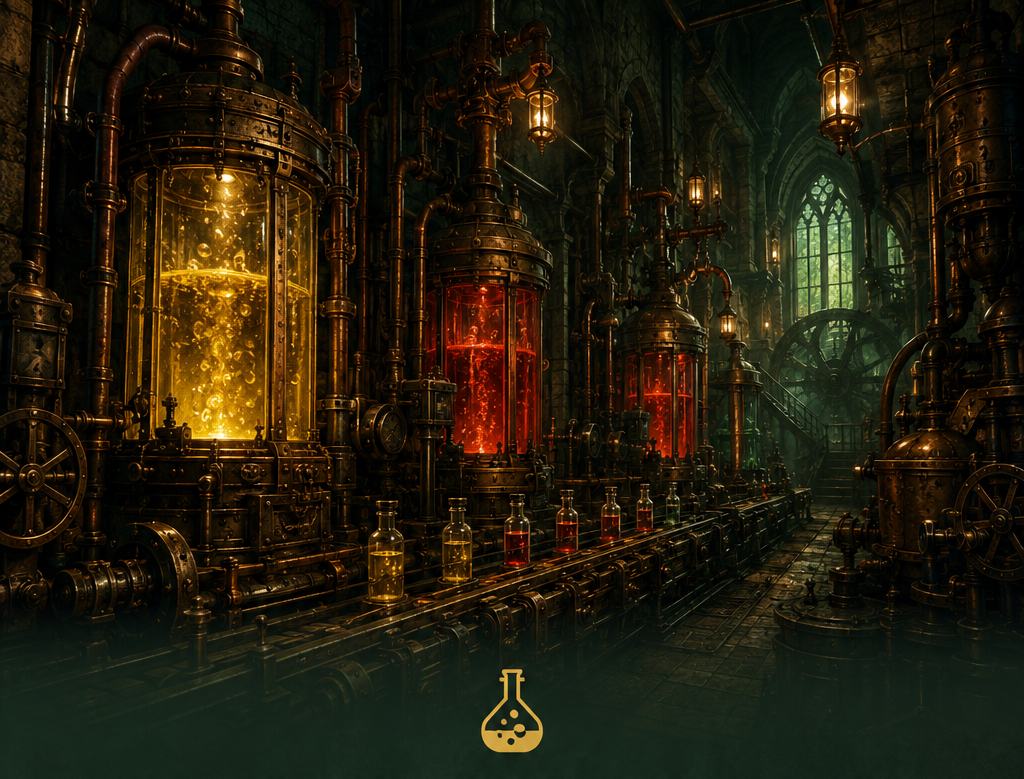
If you’ve made it to Arboria Castle and found yourself staring at a room full of conveyors, handwheels, and mysterious liquid tanks, you’re not alone. The elixir factory inside the Hills of No Return is one of Crimson Desert’s most satisfying puzzles — when you know what you’re doing. When you don’t, it’s the kind of sequence that has players circling the same room for twenty minutes wondering why nothing is working.
This guide walks you through every step of the factory from start to finish: the cultivation room, the dispenser, the washer, the crusher, the lift, the dosing pump, the heater, and the bottling machine. We’ll also cover the correct elixir ratio, where to actually collect your reward, and what to do if the quest stubbornly refuses to register even after everything looks like it’s running.
What Is the Elixir Factory and Why Are You Here
The elixir factory is part of the House Celeste questline — specifically the “Restarting the Elixir Factory” objective you unlock after defeating the Queen Spider and clearing Arboria Castle. The factory itself sits beneath and around the castle structure in the Hills of No Return, and it’s been sitting dormant long enough that every single machine in the production line needs to be brought back online manually.
Your goal is to get the entire chain running — cultivation room through to bottling — then mix and brew a “Perfect Elixir” by setting the correct ratio on the dosing pump. The factory is a linear sequence where each step unlocks the next, which sounds straightforward until the game hides handwheels behind conveyor belts and expects you to figure out where oil barrels live on your own.
If you’re mid-run on the fast travel system or still working out the bounty mechanics, the factory is a solid test of the observation skills Crimson Desert rewards throughout the game. The good news is that once you understand the layout, it flows well.
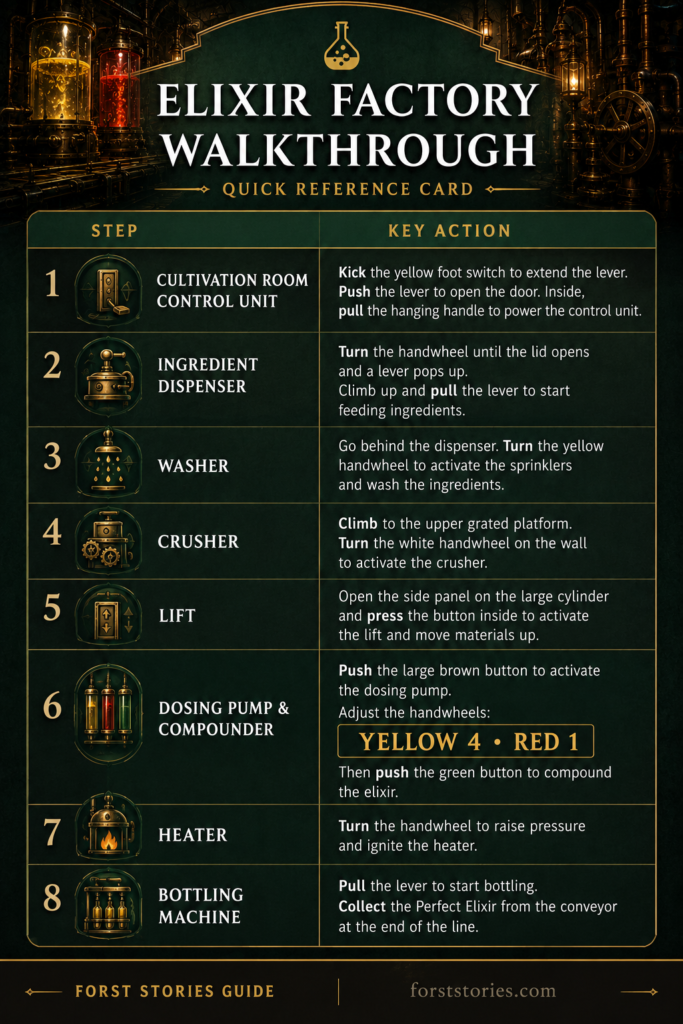
Step 1: The Cultivation Room Control Unit
Everything starts with a yellow foot switch at the base of the cultivation room door panel at the very beginning of the machinery line. This is the step most players miss first, because the yellow kick plate reads like background decoration rather than something interactive.
Kick it. Use L1 + Triangle on controller (or the equivalent on your input) while aiming at the switch. This extends a lever from the door panel. Walk into that lever and push it away from the switch to open the cultivation room door.
Head through, climb down the ladder, and follow the long hallway to a room at the far end. Pull the hanging handle or chain here to power the cultivation room control unit, then climb back up to the surface. The factory sequence cannot progress without this step completed, so if anything later seems unresponsive, this is the first thing to double-check.
Step 2: The Ingredient Dispenser
Back at the top near the cultivation room door, look for the contraption beside it. There’s a handwheel on the side of this machine — grab it and turn until the lid on top fully opens and a lever pops up.
Climb up onto the machine and pull the lever. This starts feeding ingredients onto the conveyor belt and kicks off the production chain. From ground level, the dispenser looks like just another piece of machinery, so if you’re not actively looking for something to interact with up top, it’s easy to walk past.
Step 3: The Washer — Handwheel Behind the Conveyor
Drop down behind the ingredient dispenser. On the far side of the conveyor belt is another yellow handwheel. This one is the source of a lot of frustration because it’s not visible from the main path — you have to actively walk around the back of the machine and look for it next to the belt.
Grab the handwheel and turn it fully. Wait a few seconds and the sprinklers will kick in, washing the ingredients as they move along the conveyor. The washer won’t activate until this wheel is turned, so ingredients will just roll through dry otherwise.
Step 4: The Crusher — Upper Platform
Follow the conveyor along the grated path until you reach a mechanism with a white handwheel near the belt. The key here is that you need to get up, not interact from ground level.
Climb the structure on the conveyor side to reach the grated upper platform. On the wall near the top you’ll find another handwheel — turn it fully to activate the crusher further down the line. If you’ve been playing with Force Palm skills from the Greymane Camp build progression, this is where those movement tools earn their keep for reaching elevated machinery.
Step 5: The Lift — Hidden Button Panel
Drop down from the crusher platform and follow the conveyor to the large cylindrical machine at the end of the line. On the side of this machine is a door panel — interact to open it, then press the button inside to activate the lift mechanism.
This step allows the processed materials to move up toward the compounder and dosing pump area. The button is inside the panel, so players who expect an exterior interaction often walk past it assuming the lift is automatic.
Step 6: The Dosing Pump and Compounder
Turn around from the lift panel and face the three large tubes of coloured liquid — yellow, red, and a third container. To the left of these tubes is a large brown circular button on the machine. Walk into it or push it to activate the dosing pump.
Once activated, handwheels appear in front of the yellow and red liquid cylinders. These control the volume ratios used for the brew — which brings us to the critical piece of this whole sequence.
The Perfect Elixir Ratio: Yellow 4, Red 1
Set the yellow liquid to the 4th mark (the highest line) and the red liquid to the 1st mark (the lowest line). This is the correct ratio for the Perfect Elixir, and it’s where most players spin their wheels guessing.
After setting these levels, press the big dosing pump button again to confirm the mixture. The factory needs to run a full cycle with the correct ratio, so don’t skip re-pressing that button — the game won’t flag the objective as complete if you just set the wheels and walk away.
Step 7: The Heater — Oil Barrel Location
This step trips people up because the oil barrel is not in the same room as the liquid tanks. From the dosing pump area, head through the archway to the left. Just beyond, you’ll find large oil barrels or canisters near orange-coloured machinery.
Pick up one oil barrel and carry it back to the heater, which sits near the stairs beside the liquid tanks. The heater has an oil canister slot — place the barrel in the slot, then use Force Palm (or a heavy punch) on the yellow-painted bar or rail to shove the barrel fully inside. A handle drops from above. Interact with it and hold the ignite prompt to fire the heater up.
The barrel you’re looking for is a proper oil canister, not the wooden oak barrels you’ll have seen elsewhere in the world. If you’ve been wondering how Crimson Desert’s resource types differ across zones, the factory is a good illustration — interactive items here are environment-specific.
Step 8: The Bottling Machine — Rear Lever
With the heater running, turn right and move along the machinery past the white-coloured liquid container. There is a narrow gap behind the bottling machine. Squeeze through and you’ll find a lever on the back side.
Pull this lever to activate the bottling machine. The bottling process is not automatic — the rear lever is required every time you want a production run to complete. Players who activate everything else and then wait near the front of the machine for bottles to appear will wait a long time.
Where to Collect the Quest Reward
Once the factory is running with the correct ratio and all machines are active, elixir bottles will be produced at the bottling station. After the “Produce the perfect elixir” objective completes, the game directs you back toward the cultivation room area — specifically to a compartment near the cultivation control unit where you pulled the chain at the very start.
Head back down the original ladder. The reward, a Fertilizer Sprayer, is in a compartment just inside or next to that cultivation room. It is not near the dosing tanks or the bottling machine, which catches a lot of players off guard.
What to Do if the Quest Won’t Register
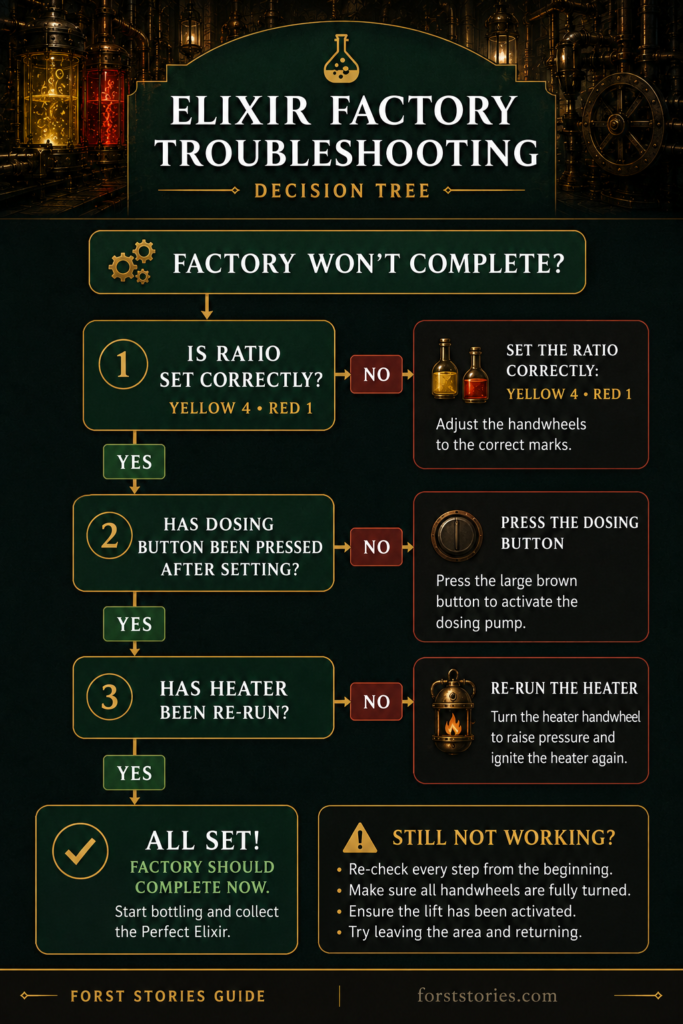
The Arboria Castle factory has a known issue where the “Produce the perfect elixir” objective won’t tick as complete even when every machine appears to be running correctly. Here’s how to work through it:
Re-check the ratio first. Return to the dosing pump and set yellow to the 4th mark and red to the 1st mark again, then press the dosing button once more. It’s surprisingly easy to knock a wheel slightly off while interacting with nearby machines.
Re-run the heater and bottler. After re-setting the ratio, redo the oil barrel step and pull the bottling machine rear lever again. The system needs to complete a fresh cycle using the updated mixture settings.
Wait for a full cycle. Stand near the bottling line and let the machine complete a full production run before checking your objective log. The quest condition sometimes only checks when a batch actually finishes rather than when the machine first activates.
Teleport away and return. If none of the above works, fast travel to a nearby Abyss Nexus and then return to Arboria Castle. This forces the machines to reset, letting you run the full sequence again from the cultivation room down. Several players report this clears whatever state is causing the soft-fail.
The Factory as a Tabletop Design Problem
For anyone at Forst Stories who spends time thinking about both digital and tabletop game design, the elixir factory is a fascinating piece of puzzle architecture. Each machine functions as a distinct node in a skill chain — miss any activation and the downstream steps either won’t work or won’t register. It mirrors a GM-run puzzle dungeon closely: the players must identify interactive elements, execute them in order, and troubleshoot when something doesn’t produce the expected output.
The ratio puzzle in particular translates beautifully to tabletop. “Four parts yellow, one part red” is exactly the kind of clue a GM might hide in an alchemist’s journal or on a crumbling wall inscription, with failure states that produce the wrong elixir rather than nothing at all. If you run a game where crafting and alchemy feature, the Arboria factory sequence is worth stealing wholesale.
The bounty system in Crimson Desert uses a similar layered-conditions approach — you don’t just fight a target, you meet several hidden criteria simultaneously. Both systems reward players who read environments carefully rather than button-mashing through them, which aligns with how good tabletop puzzle design should work too.
Quick Reference: The Full Sequence
For anyone who just wants the order at a glance before diving back in:
- Kick the yellow foot switch near the cultivation room door — push the extended lever to open it
- Descend the ladder, pull the chain at the end of the hallway, climb back up
- Turn the dispenser handwheel until a lever appears, then climb up and pull it
- Walk behind the conveyor to find the washer handwheel — turn it fully
- Climb the structure beside the crusher to reach the upper platform — turn the wall handwheel
- Interact with the side panel of the cylindrical machine at the end of the line — press the inside button
- Push the large brown dosing pump button to activate handwheels on the liquid cylinders
- Set yellow to 4, red to 1 — press the dosing pump button again
- Fetch an oil barrel from through the left archway — place it in the heater slot, Force Palm it in, pull the ignite handle
- Squeeze behind the bottling machine and pull the rear lever
- Wait for a full production run, then head back to the cultivation room for the Fertilizer Sprayer
If you’re still building out your Arboria region knowledge, the lantern and memory fragment mechanics in the same general area reward thorough exploration too — and the lore fragments around Arboria Castle are some of the more rewarding ones in the game.
Continue Your Journey
More Crimson Desert guides on Forst Stories:
- How to Unlock Lightning and Elemental Imbue in Crimson Desert — master Greymane’s combat toolkit
- How Fast Travel Works in Crimson Desert — Abyss Nexus locations and how the system connects
- How to Use Your Lantern and Read Memory Fragments — collect lore and hidden items as you explore
- How to Build and Expand Greymane Camp — your base of operations and how it grows
- How to Capture Bounties Alive in Crimson Desert — the full bounty hunting guide
Have you completed the Arboria Castle factory? Drop a comment below if you hit any of the soft-fail bugs — and let us know whether the teleport-reset trick worked for you.
Want more Crimson Desert walkthroughs and guides delivered straight to your inbox? The Scriptorium Newsletter goes out weekly — subscribe below.
RPG news, GM tips, and system deep dives — straight to your inbox, no filler.


